 Tutorial
Archived
- Zoo Tycoon 2
- Objects & Scenery
- Scripting
- #Photoshop
- #Fur
- Reading time
- 5 min
- Comments
- 0
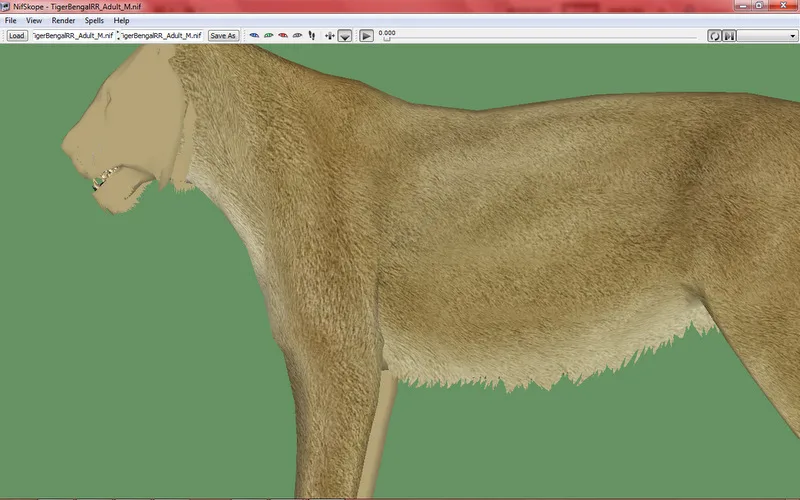
Learn how to apply realistic animal textures using color blending, shading, and Photoshop techniques.
by Leopard Claw
Since my main tutorial may take a while to make I thought I’d quickly give you a taste of what’s to come in the form of an applying textures tutorial.
This tutorial can be used in any program; however it will be easiest to replicate what I do here in Photoshop CS5. But this is NOT necessary. The concepts remain the same.
Thanks to Simba’s Tiger model who’s UV was used for this.
Warning
Note from ZooBerry: the texture used in this tutorial might require contact with the author for licensing. Use it for educational purposes only.
Ok, so first we are going to want to get the colour painting right as TR said in his tutorial. The colours should be merged together to make smooth transitions.
Next, we’ll need to add shading just as TR did by painting white (highlights) and black (shadows) in a soft light layer. We should get something similar to this (this is not as accurate as it should be for a lion). Here is how it should be so far:
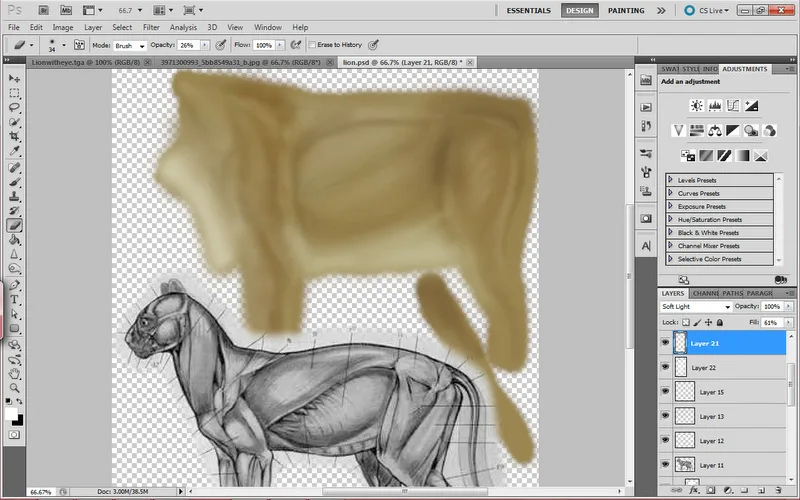
We can do the shading afterwards instead though. Some people may find it easier that way.
Ok, so now on to the main show…the texture. Open the lion texture and desaturate it. We’ll need to make the lion texture image relatively consistent throughout. It has a vein that runs through the middle.
After the texture is desaturated, we will be able to see the texture image in what is called grayscale. As an automatic way of evening out shadows and highlights, Photoshop users can use the ‘high pass’ tool under FILTER-->OTHER-->HIGH PASS.
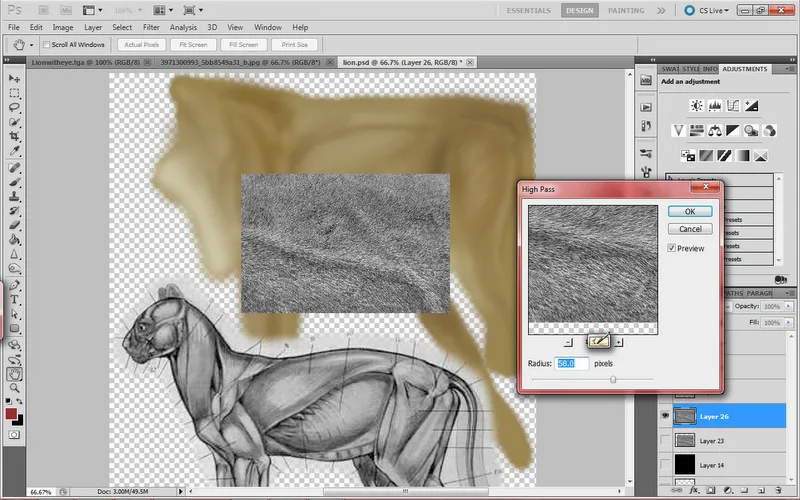
We can then, using the white and black paint brushes in a soft light layer make the texture even along the vein, which the high passing would not have removed, and essentially remove it by painting on it. This is very much the same way you do the shading. We can turn THIS:
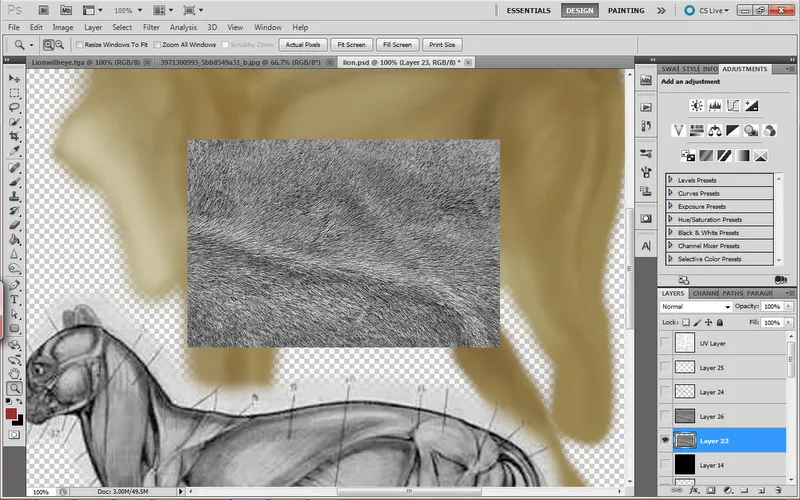
INTO THIS:
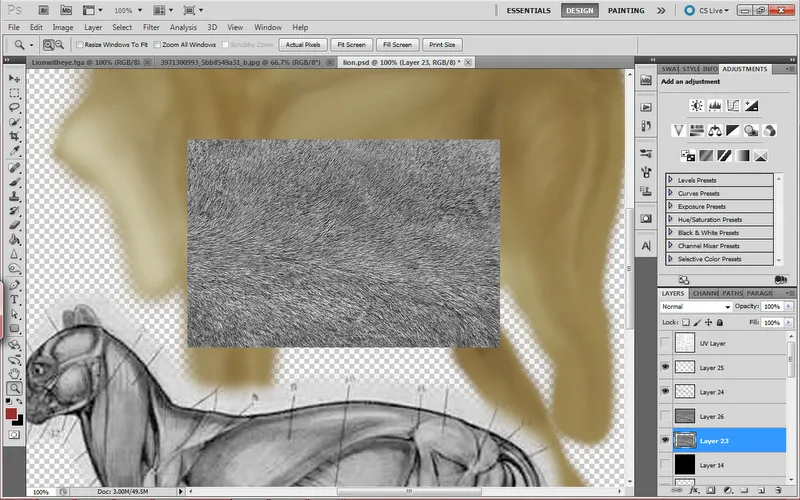
In order to make the texture more realistic and of the appropriate size of the fur on the animal, we may need to resize the image. Merge the image layer with the shadows and highlights and resize to something suitable. Then sharpen the whole texture afterwards with UNSHARP MASK.
Now, we’ll need to rotate this of course, but first we need to make sure we get the flow right. The best way to do this is to draw ‘flow lines’ of the way the texture should ideally flow. These will act as a guide for rotating the texture which we will get onto later.
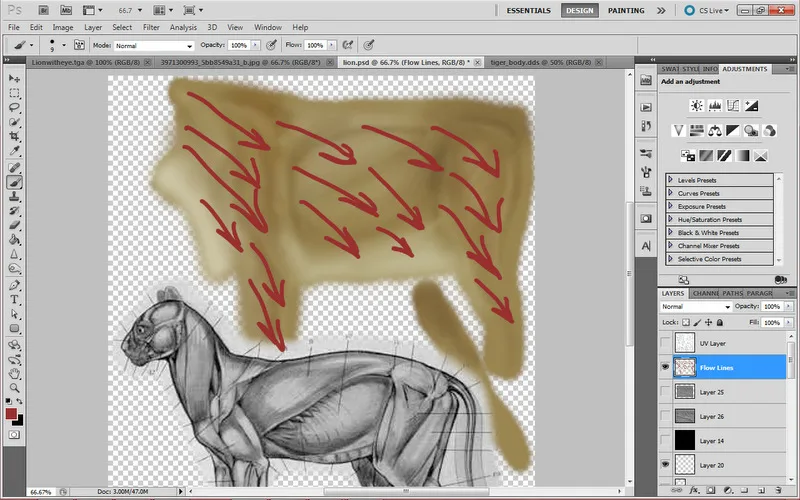
Ok, so this is the trickiest part. So PAY CLOSE ATTENTION!
The key to this is to MAINTAIN THE TEXTURE QUALITY. We can do this by flipping the texture vertically, taking the texture and moving it (no rotating yet) to here:
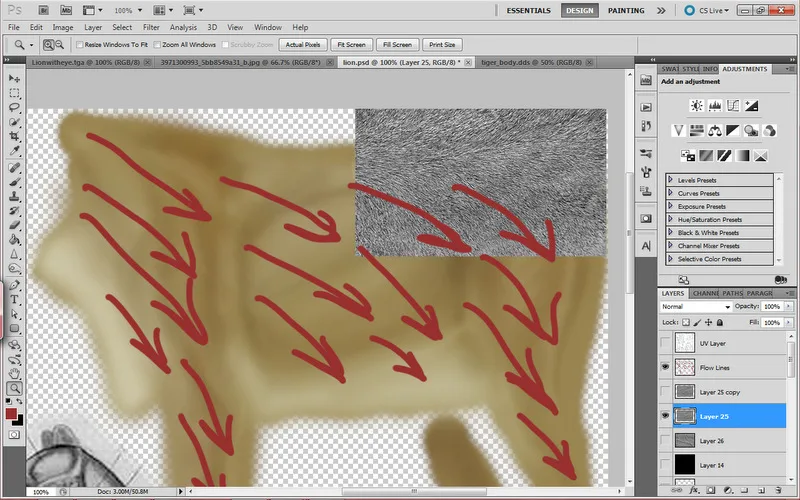
I have put it here simply because it fits the direction of the flow lines. You must understand how to MAINTAIN and CONSERVE texture quality. Whenever you rotate and image in Photoshop, quality is lost and so it is ESSENTIAL that in order to get the best results in terms of quality, the original piece of texture here has not been rotated and so still retains its original quality. When we start duplicating the texture layer, we must duplicate the ORIGINAL fur texture we put on the back leg. Therefore, each bit of rotated texture that we will place on other parts of the skin will have only been through ONE rotation and only lost quality ONCE. You have to rotate the texture so it flows correctly and this is the best way to ensure quality is maintained and consistent throughout.
Sharpening is also useful here after each rotation.
We must also blend the texture together otherwise that will be apparent when overlayed/soft lighted later. We can do this either with a low opacity eraser tool or with a layer mask (Google it if you don’t know what this is). What I often do when blending is after erasing away the edge of the top layer is to use the sharpener tool to sharpen the now semi-transparent edge, which I feel makes the transition smoother since the very slight change from sharp texture to semi-transparent texture is less apparent because of this.
Here is the process:
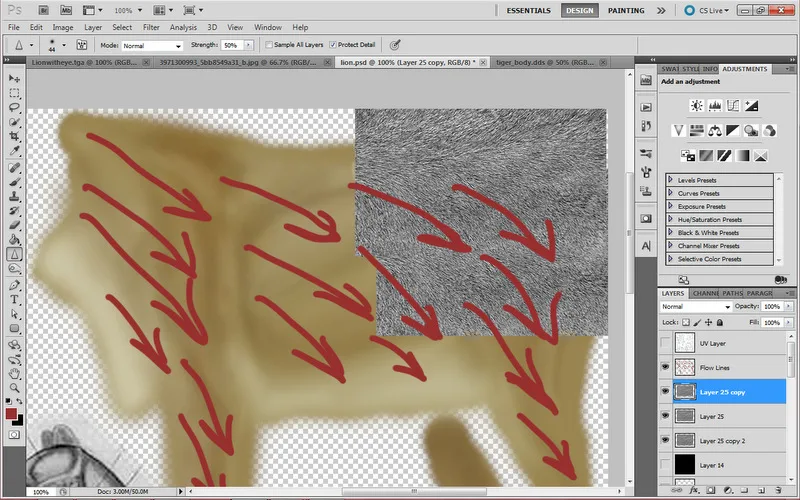
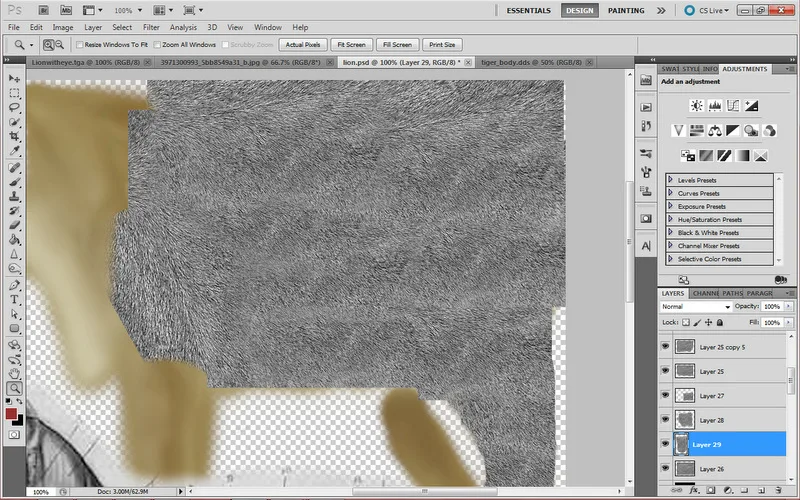
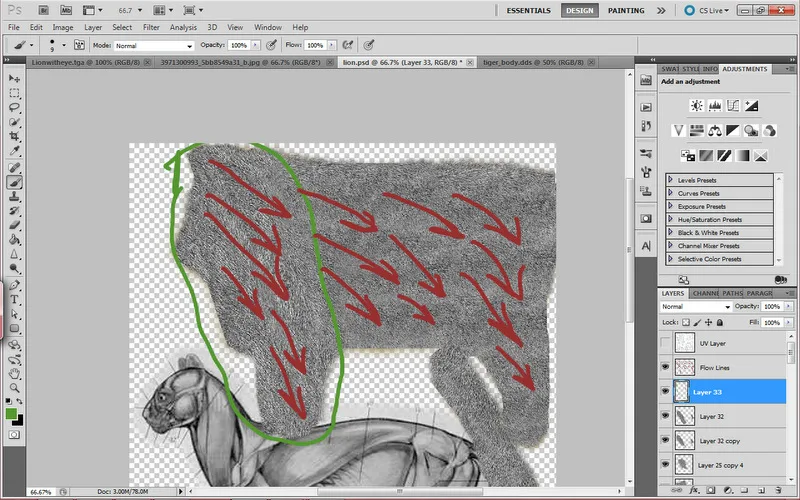
You can see on this last one how I made sure the fur around this area was slightly coarser than the rest as the neck area generally is.
Ok so we now have our texture in all its evenness and consistency. Remember, this was made by using ONLY this one lion texture image; you can create a lot out of not very much.
This is by far the best part as you witness your texture taking its effect and your skin ‘come to life’ as you either overlay or soft light it over your skin. Merge all the texture layers that have accumulated and copy it. Then, undo all that so we have all the layers again and paste the merged texture. Hide all the layers so they do not take effect. This is just a good back-up plan if we ever feel like changing the texture later on.
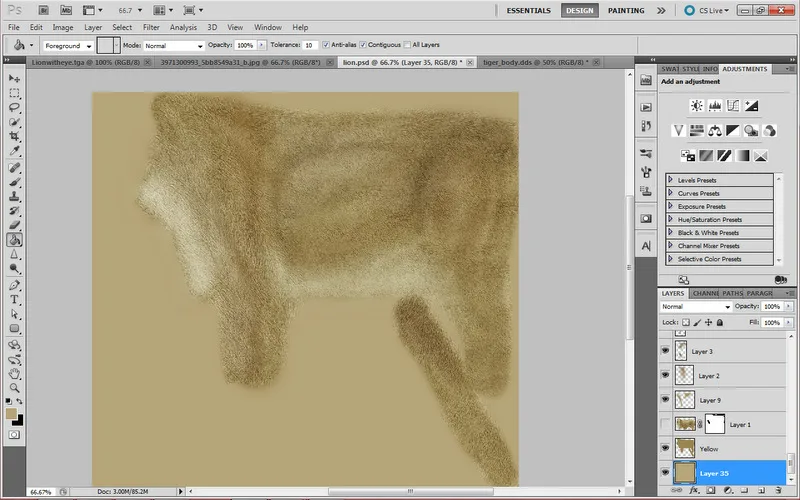
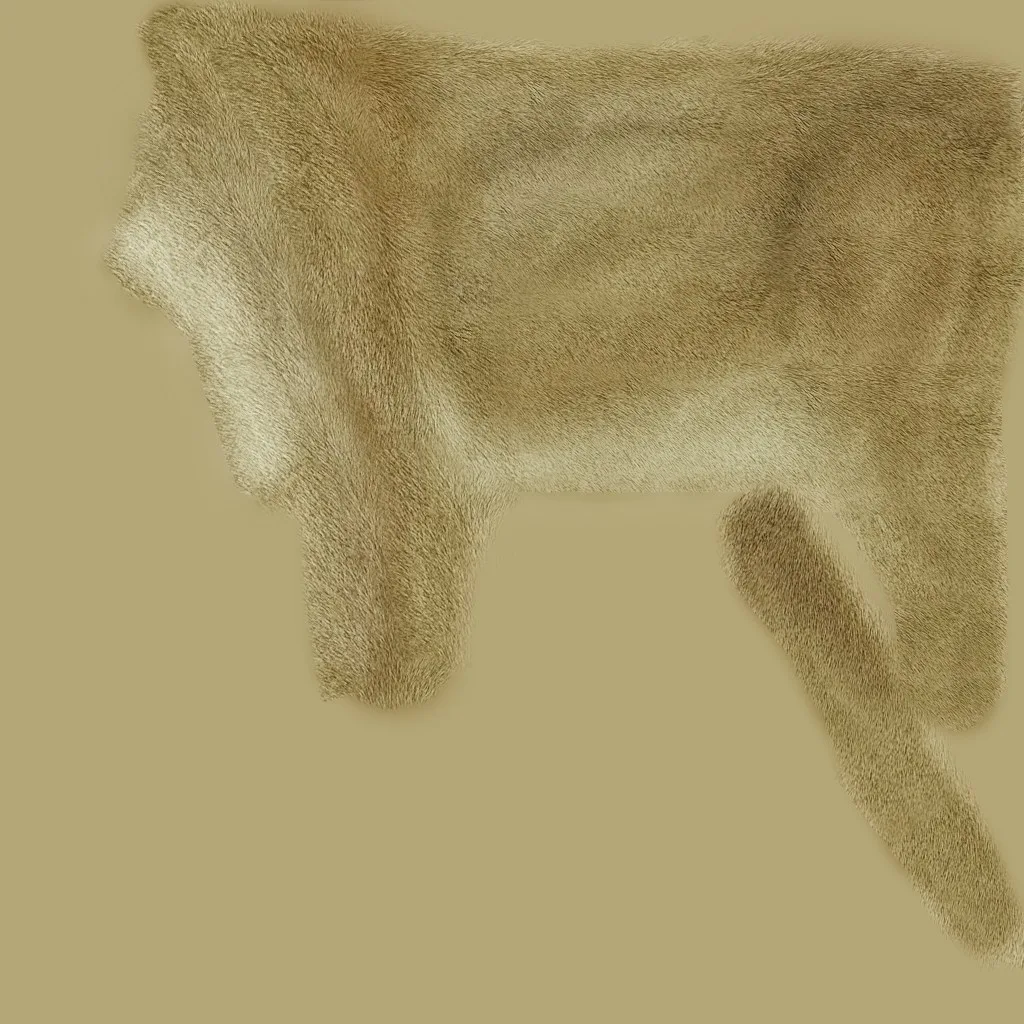
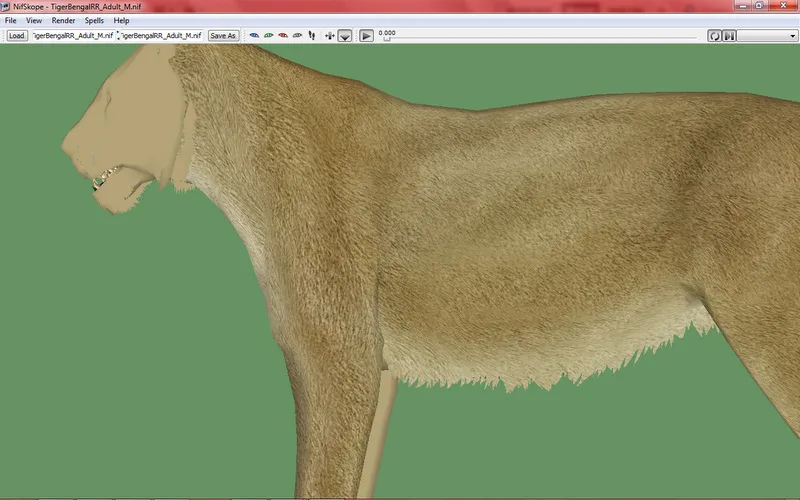
So this is what comes out. This would look a lot better if applied to a skin which has been photosourced rather than hand drawn like this. The skin here does not look that REALISTIC which is the problem with hand drawn skins sometimes. The shading I did was not the best so do not follow how I’ve shaded this if you ever hand draw skins. You should make sure it’s very accurate. Anyways, the purpose of this tutorial was to display the stages of texturing any skin and to convey how important getting the texture right can be.
Fullsize pic:
Nifskope pic:
Hope this has been helpful. Any questions AT ALL I will answer in my projects thread or feel free to PM me, whatever, it’s your choice ;)
Here’s the PSD if anyone wants to take a look at all the layers. It might help you to understand what I said: http://www.mediafire.com/?l9ft4mwt1msfqfl
Note
Note from ZooBerry: in case the mediafire link ever goes down, it has been backed up in the files section of this article. Just unzip the archive to find the PSD file.
My main tutorial will come later, so look forward to that and thanks for listening! :D
-LC
lion.zip
12.9 MB · 0 downloads
Tutorial
Archived
 Tutorial
Archived
I may aswell share it. It includes the locations for the zoopedia and for the xml files.
 Tutorial
Archived
Comments 0
Log in to join the conversation.
No comments yet.